This often creates slow relay speeds and connection issues.
This will provide you the maximum bandwidth limit and give you better internet speed.
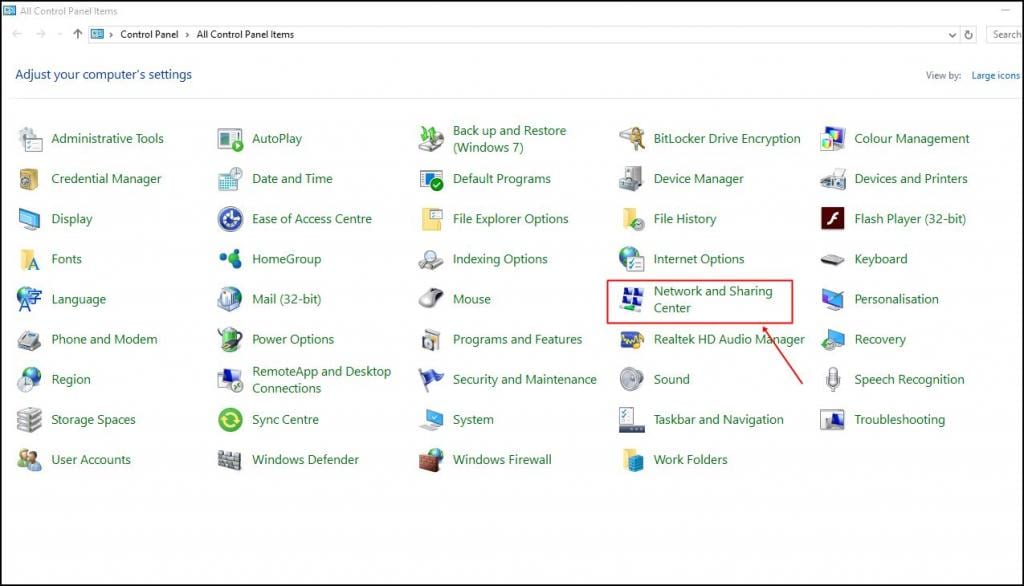
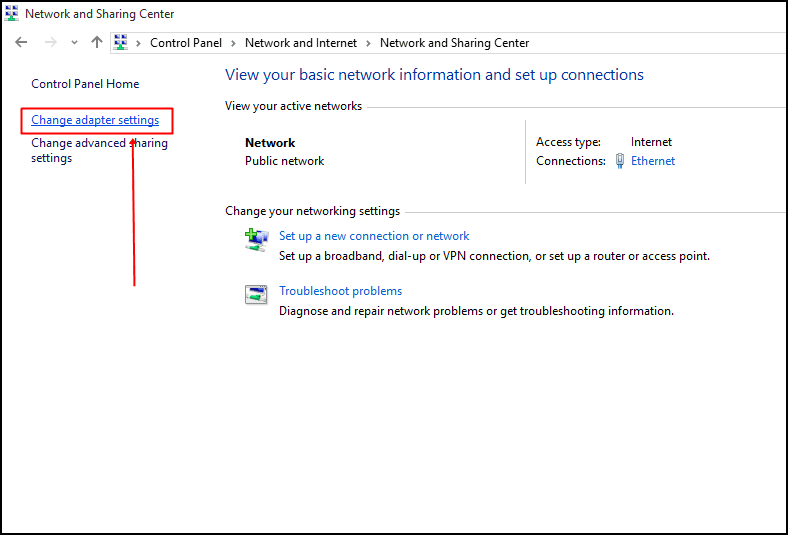
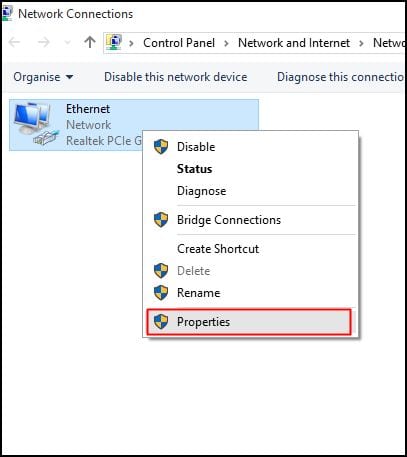
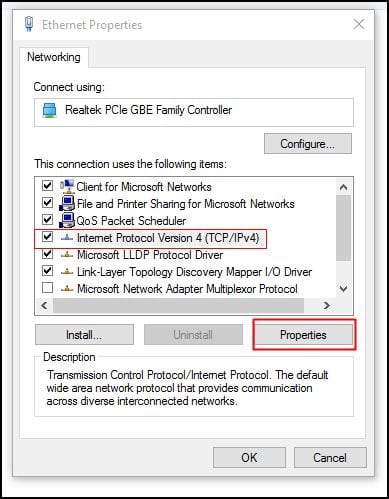
Step 2.And there click onChange adapter tweaks.

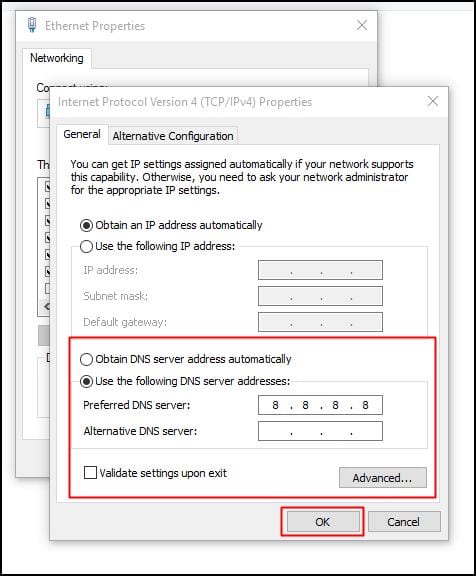
Now there fill the value of google DNS value that is8.8.8.8OR8.8.4.4and then simply click onOKand then start your connection.
you are done, You are now surfing the Internet using Google DNS servers.
Note : For Windows 10, the steps are more or less same.
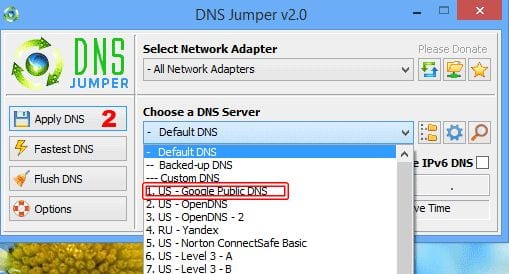
Using DNS Jumper software allows you the flexibility of choosing different DNS including Google and Open DNS with ease.
Step 1.Download and installDNS Jumperin your windows PC.

source: www.techworm.net
