Also, it has the most success rate in the market in comparison with any other of its competitors.
This toolkit supports over 6000+ Android devices around the world.
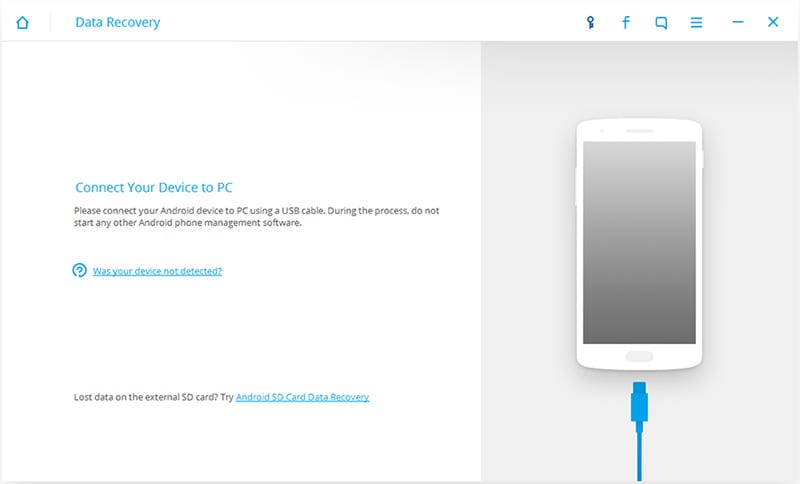
Now, you oughta connect the gear from which you want to retrieve photos with a data cable.

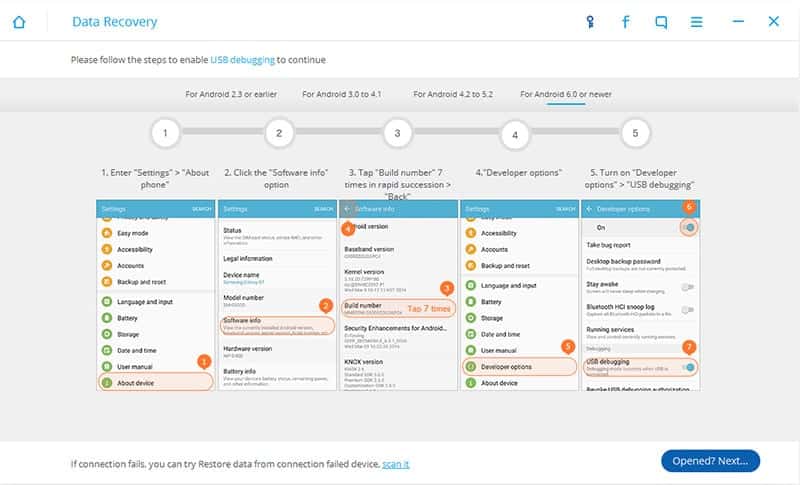
Just follow the instructions you will in the window below.
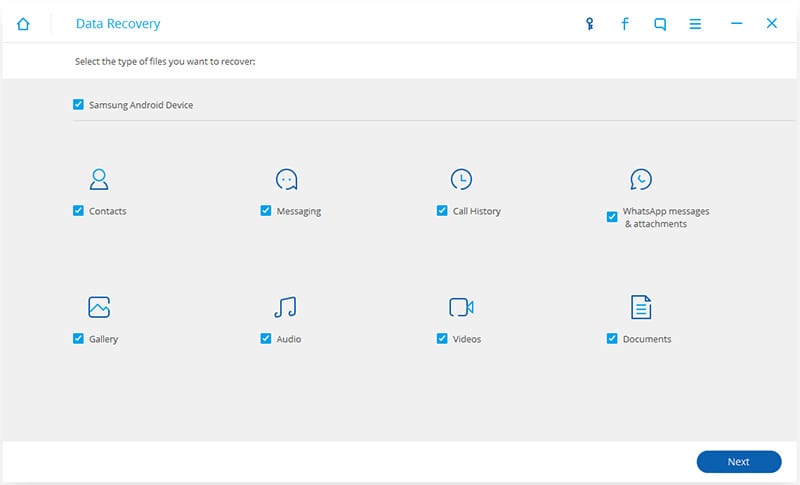
Deselect all and select only the Gallery option.
Click next to continue further.
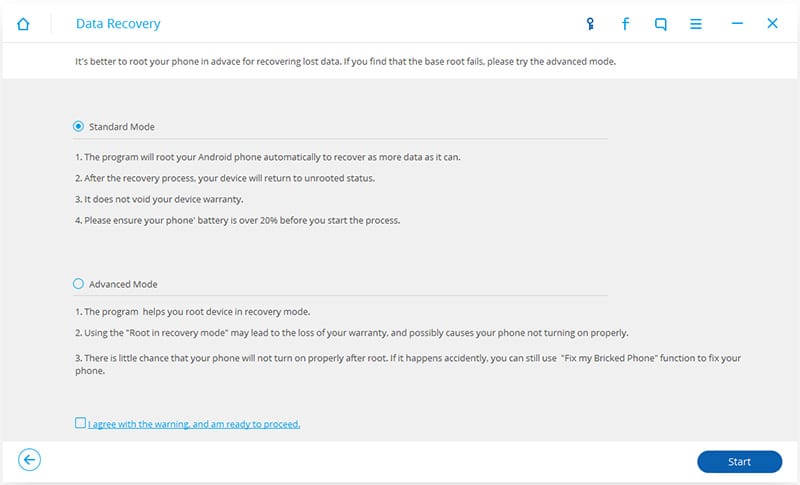
For your first try, Standard Mode is recommended.
Accept the warning message and click Next to continue.
If it doesnt work, you might switch to the advanced one as a second try later.
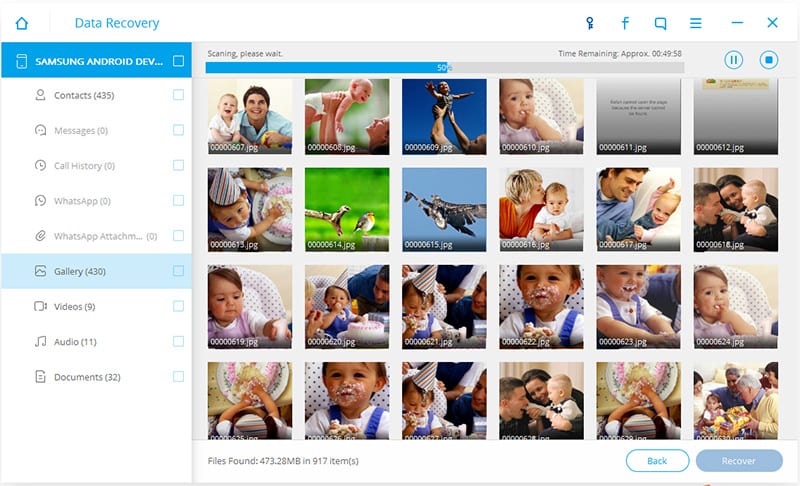
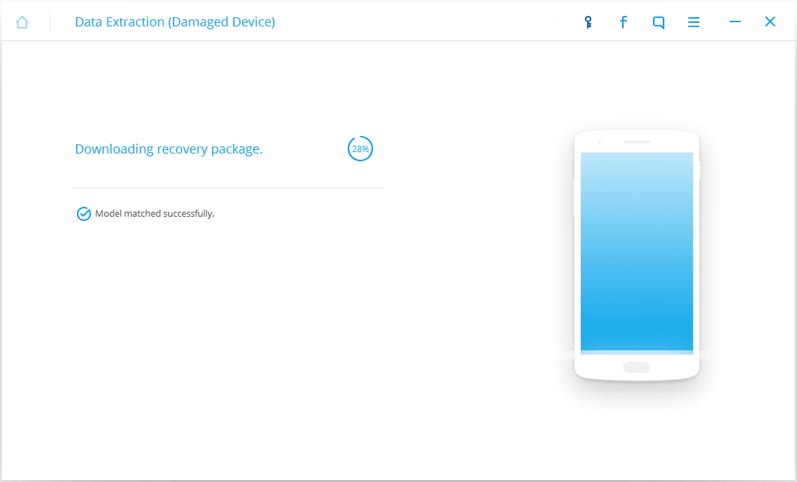
Step 6: The process of scanning has started now.
This process will take a while to complete.
Keep your machine connected to the computer in the whole process.
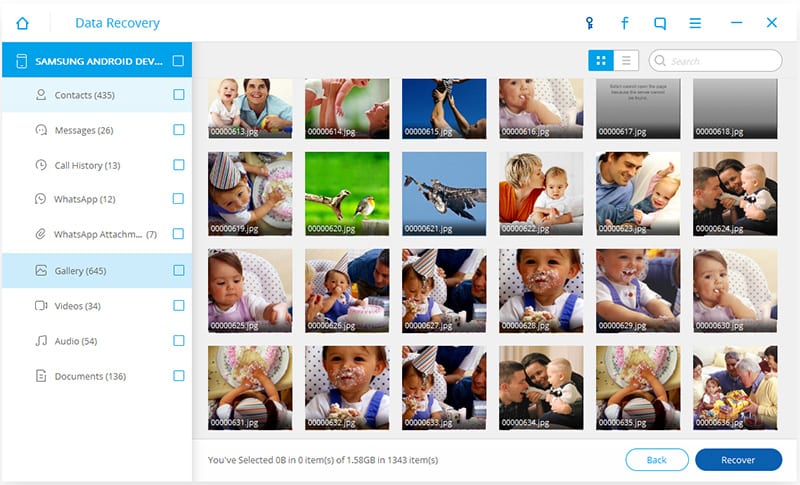
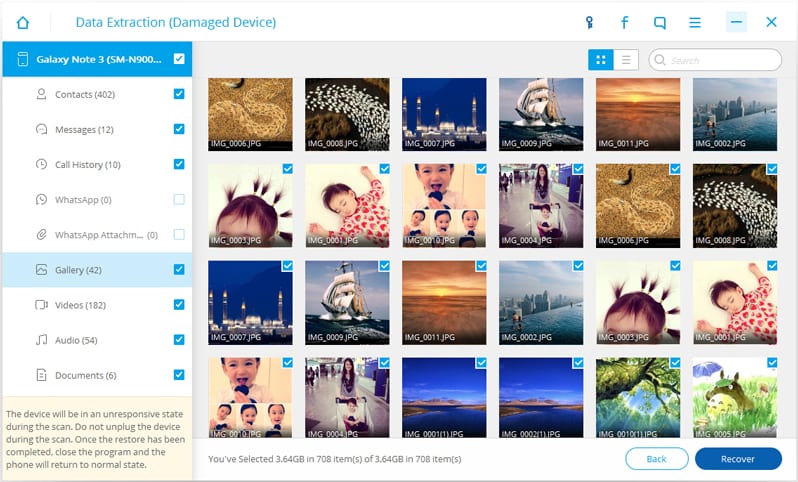
punch gallery at the left side menu for the preview.
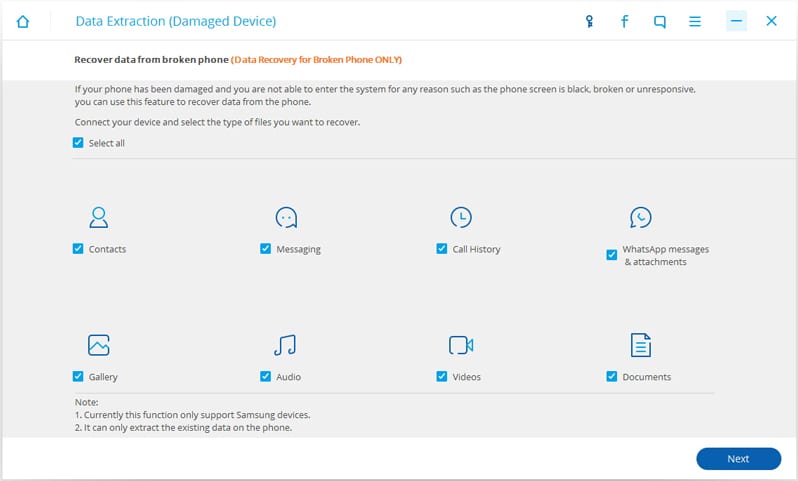
The Android Data Recovery will allow you the freedom to retrieve photos from a broken gear.
To do so, follow the step by step instructions below.
Step 1 : Firstly punch Data Extraction (Damaged gadget) from the middle of the dashboard.
Check on Gallery to go on.
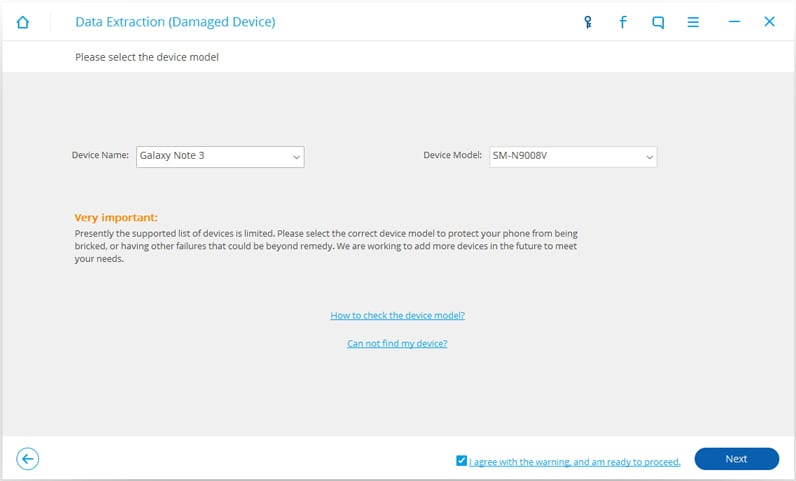
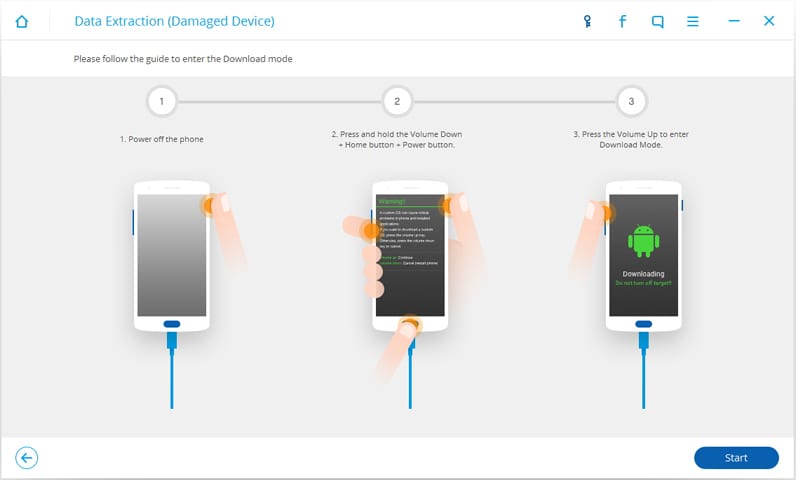
Step 3: Here, you could find two situations for your damaged Android rig.
snag the proper situation for your damaged machine and continue.
Step 4: In this step, choose the name and model of your gear carefully.
Selecting the wrong machine can brick your machine.
So, be very careful at this step.
This may take some time to complete.
Step 7: Next the toolkit, start scanning your gear for data on it.
Now, check your desired photos and clicking the Recover at the bottom.
Try this revolutionary tool to experience the difference.
This tool is completely free to try.


source: www.techworm.net
